Most people use Seedance 2.0 too casually.
They type one cinematic sentence, wait for a clip, and then blame the model when the camera drifts, the product changes shape, or the character forgets what scene they are in.
That is the wrong way to use it.
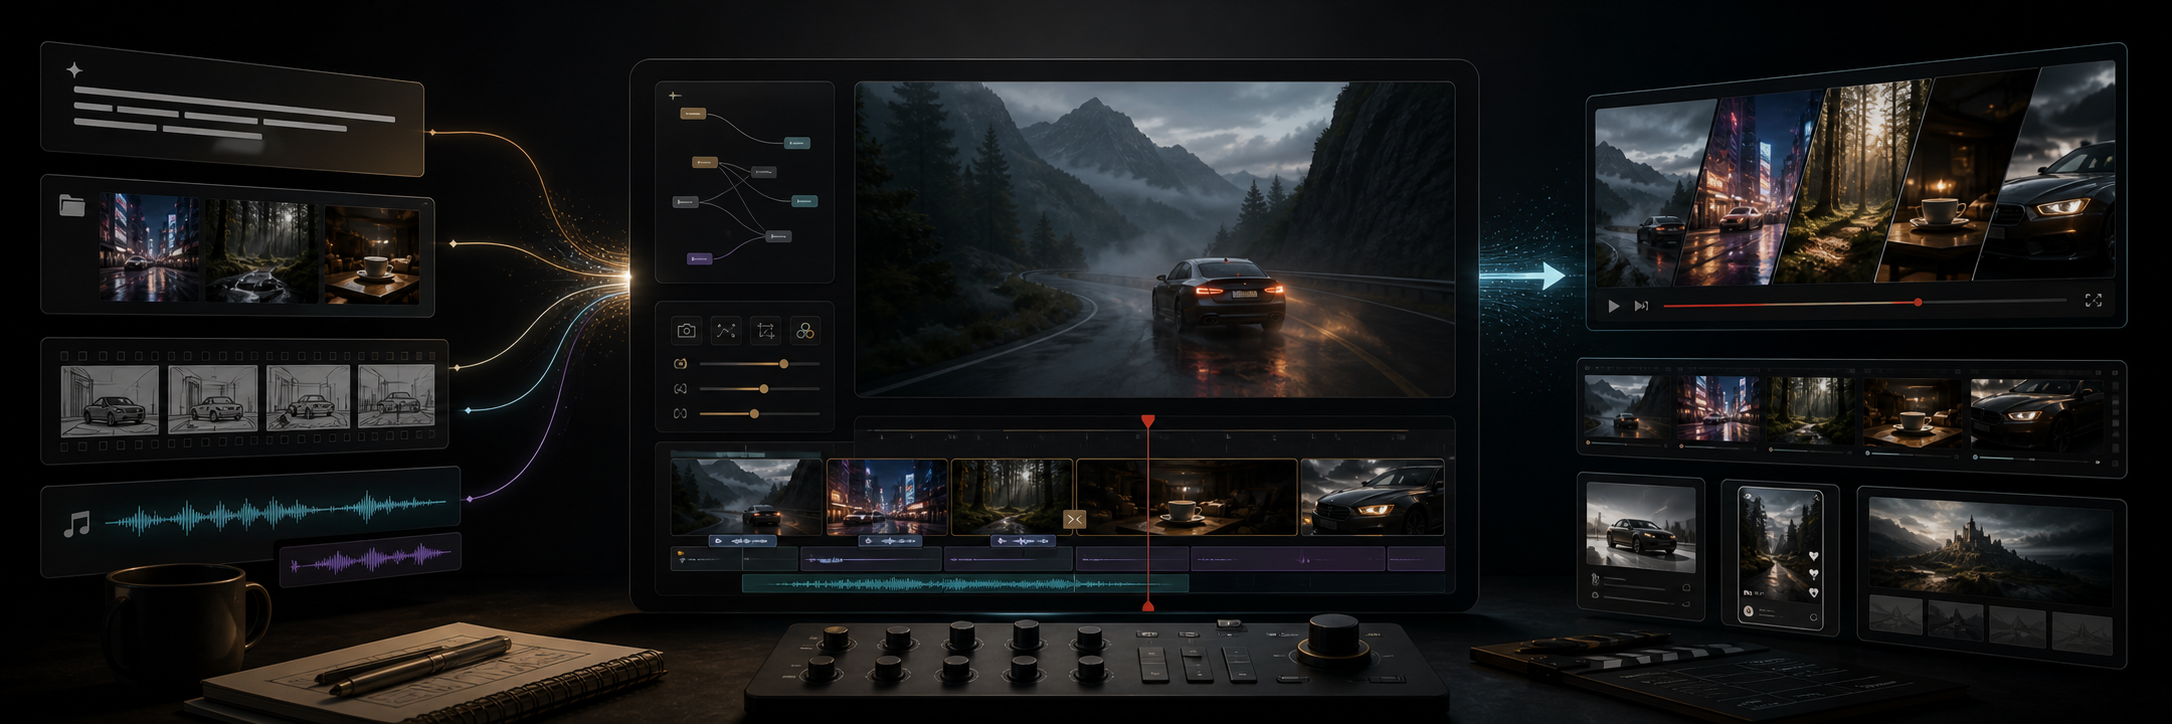
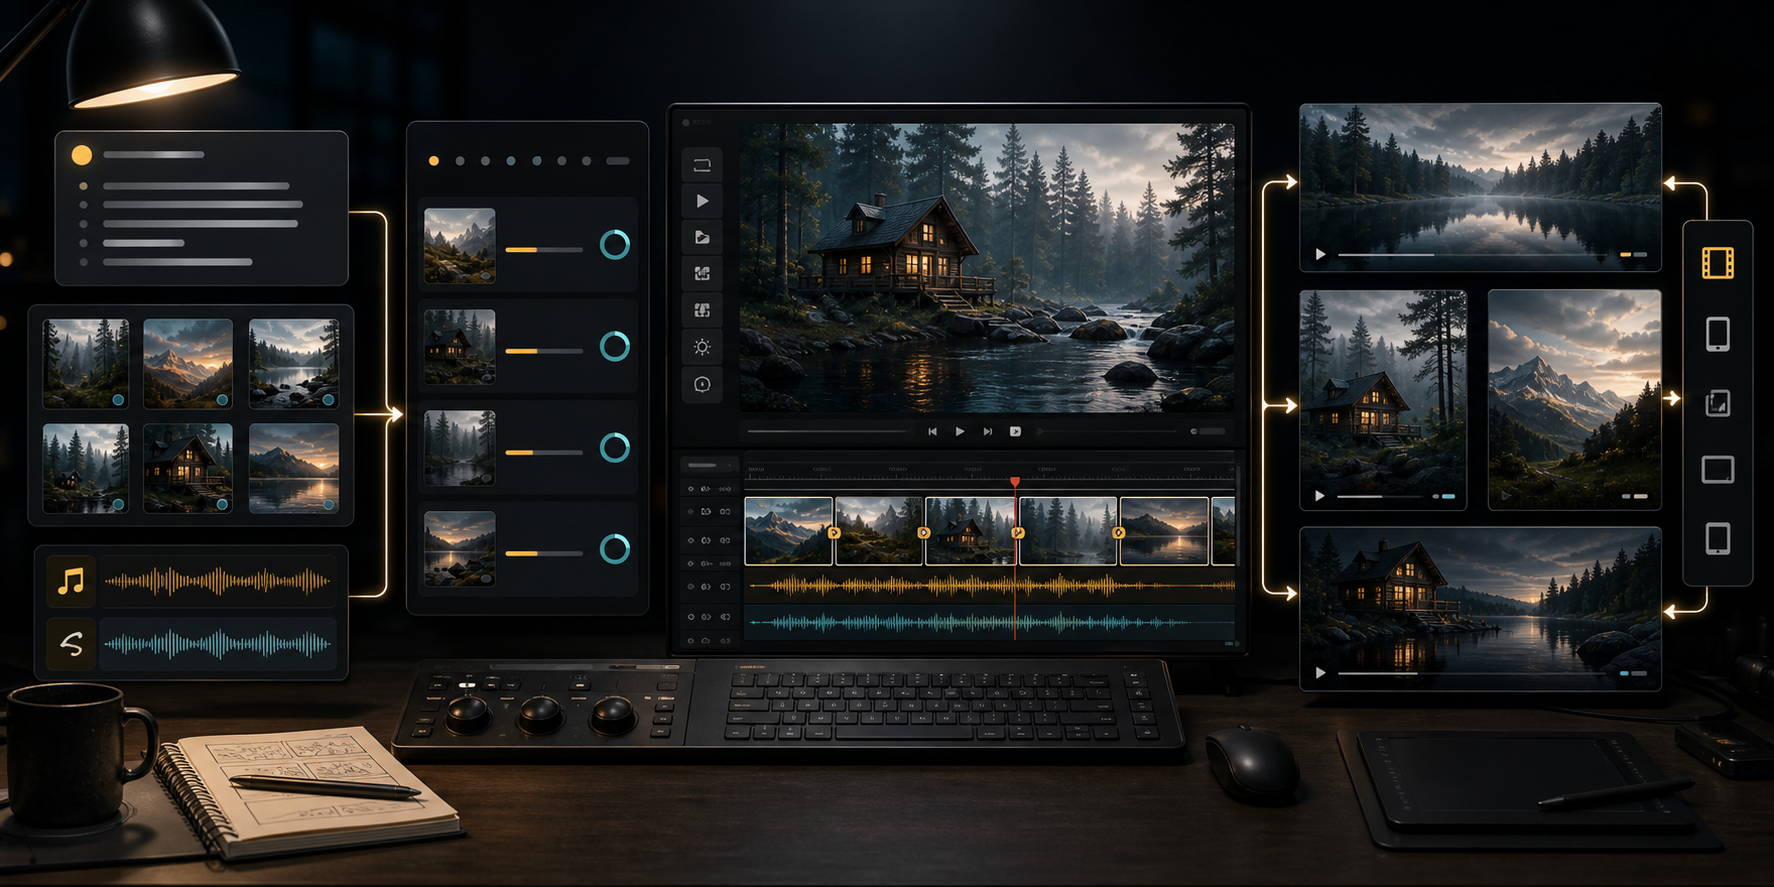
Seedance 2.0 is not only a text-to-video button. It is a multimodal AI video model from ByteDance's Seed team, available in documented international workflows through BytePlus ModelArk as Dreamina Seedance 2.0. It can generate short MP4 videos from text, images, video references, audio references, and combined creative briefs. It can also support editing and extension workflows depending on the product surface you are using.
The useful way to use Seedance 2.0 is to treat it like a production assistant.
Give it a job. Give it references. Give it camera direction. Give it duration, aspect ratio, motion, audio intent, and review criteria.
Then judge the output by whether the clip is usable, not whether the first frame looks impressive.
Quick Answer
To use Seedance 2.0 well:
- Choose the right workflow: text-to-video for open concepts, image-to-video for products or fixed first frames, API generation for software products.
- Pick the right model tier: Mini or Fast for drafts, full Seedance 2.0 for higher-resolution final attempts where supported.
- Write the prompt like a compact director's brief: subject, action, camera, scene, lighting, duration, ratio, audio, and avoid rules.
- Add references only when they have clear roles: product identity, character look, camera motion, lighting, rhythm, or final frame.
- Generate short drafts first.
- Review the output for motion, continuity, product accuracy, faces, hands, text, audio sync, policy risk, and compression.
- Save the prompt, model ID, references, settings, cost, and approved file.
If you are using a studio-style website, Seedance 2.0 is best for creators and marketers who need short clips from prompts or reference images.
If you are building a product, use the BytePlus ModelArk flow like a queue: create a task, store the task ID, poll status, retrieve the MP4, and log usage.
Before You Start
Seedance 2.0 has more than one access path.
You may encounter it in a creator tool, a ByteDance product, a wrapper site, or the BytePlus ModelArk API. Those surfaces may expose different controls. One tool may give you a simple prompt box and upload button. Another may expose model IDs, callback URLs, watermark settings, resolution parameters, and task status APIs.
Do not assume every Seedance 2.0 page has the same features.
Before you start, check five things:
| Setup question | Why it matters |
|---|---|
| Which model tier are you using? | Full, Fast, and Mini can differ in cost, latency, and resolution |
| Are you using text-to-video or image-to-video? | Image-to-video is usually better when product or character consistency matters |
| What duration is supported? | Current Seedance 2.0 series docs generally point to short clips, often in the 4-to-15-second range |
| What resolution is available? | Full Seedance 2.0 may support higher resolutions where enabled, while Fast/Mini are typically draft-oriented |
| Does your surface support audio? | Seedance 2.0 is designed for audio-video work, but product exposure can vary |
One more thing: Seedance 2.5 exists.
ByteDance introduced Seedance 2.5 on July 31, 2026, after the February 12, 2026 Seedance 2.0 launch. The newer model is relevant for longer and more reference-heavy workflows where available. But Seedance 2.0 still matters because it has a concrete documented production path and model tiers in current BytePlus-style workflows.
For a how-to article, that means we should not pretend Seedance 2.0 is the newest thing in every context.
It is the practical thing in many contexts.
Choose The Right Seedance 2.0 Mode
Your first decision is not the prompt.
It is the mode.
| Mode | Use it when | Avoid it when |
|---|---|---|
| Text-to-video | You have an idea but no source asset | The product, face, character, or composition must stay exact |
| Image-to-video | You have a product photo, keyframe, character, or designed first frame | You do not care about visual consistency |
| First-and-last-frame video | You need a controlled transition between two states | You only need a loose cinematic scene |
| Reference-based generation | You need visual style, product identity, camera motion, or audio rhythm from source assets | You are uploading references without telling the model what each one means |
| API generation | Users generate videos inside your app | You only need a few manual clips for yourself |
This matters for our website as well.
A site that covers many AI video models should not push every user into the same "generate video" flow. Seedance 2.0 belongs in at least two user journeys: a simple studio workflow for creators and a model/API guide for builders. The creator needs a clean prompt box, upload controls, aspect ratio, duration, and preview. The developer needs model IDs, task lifecycle, cost tracking, callbacks, and storage behavior.
Those are different jobs.
Step 1: Start With The Job
Do not start with style words.
Start with the job the clip needs to do.
Bad starting point:
Make a cinematic video.
Better starting point:
Create a 6-second vertical product teaser for a running shoe launch.
That one sentence already gives Seedance 2.0 more structure: output type, length, orientation, commercial context, and subject.
Here are useful job frames:
| Job | Better first sentence |
|---|---|
| Product teaser | Create a 6-second vertical product teaser for a matte black running shoe. |
| Blog visual | Create a 5-second widescreen clip showing an AI video workflow on a dark editing desk. |
| Social ad | Create an 8-second 9:16 social ad concept for a skincare bottle on a bathroom counter. |
| Real estate scene | Create a 6-second interior walkthrough from a designed living-room reference image. |
| Character animation | Animate the uploaded character keyframe with a slow head turn and subtle background motion. |
| App preview | Create a short abstract video showing a mobile app concept flowing through screens without readable text. |
The model cannot fix a vague goal.
If the job is fuzzy, the output will be fuzzy.
Step 2: Pick Text-to-video or Image-to-video
Text-to-video is tempting because it feels faster. You type an idea and get a clip.
Use it when the subject can be invented:
- Mood scenes
- Concept clips
- Abstract visuals
- Background loops
- Early ad directions
- Storyboard roughs
- Explainer visuals
Image-to-video is usually better when the subject already exists:
- Product photos
- Fashion looks
- Food shots
- Room interiors
- Character designs
- Brand assets
- Designed first frames
- E-commerce visuals
The rule is simple:
If accuracy matters, start from an image.
If exploration matters, start from text.
For a website like ours, this distinction is useful for routing. A user who wants "a product video" should probably be pushed toward image-to-video. A user who wants "a surreal sci-fi scene" can start with text-to-video. A user who has a weak source image may need to fix the still image first with an image model such as Nano Banana before sending it into Seedance 2.0.
Video models amplify the quality of the source frame.
They do not magically rescue bad art direction.
Step 3: Write A Director's Prompt
A strong Seedance 2.0 prompt reads like a short director's note.
It should describe what happens on screen, how the camera moves, how long the shot lasts, what the image should feel like, and what must not change.
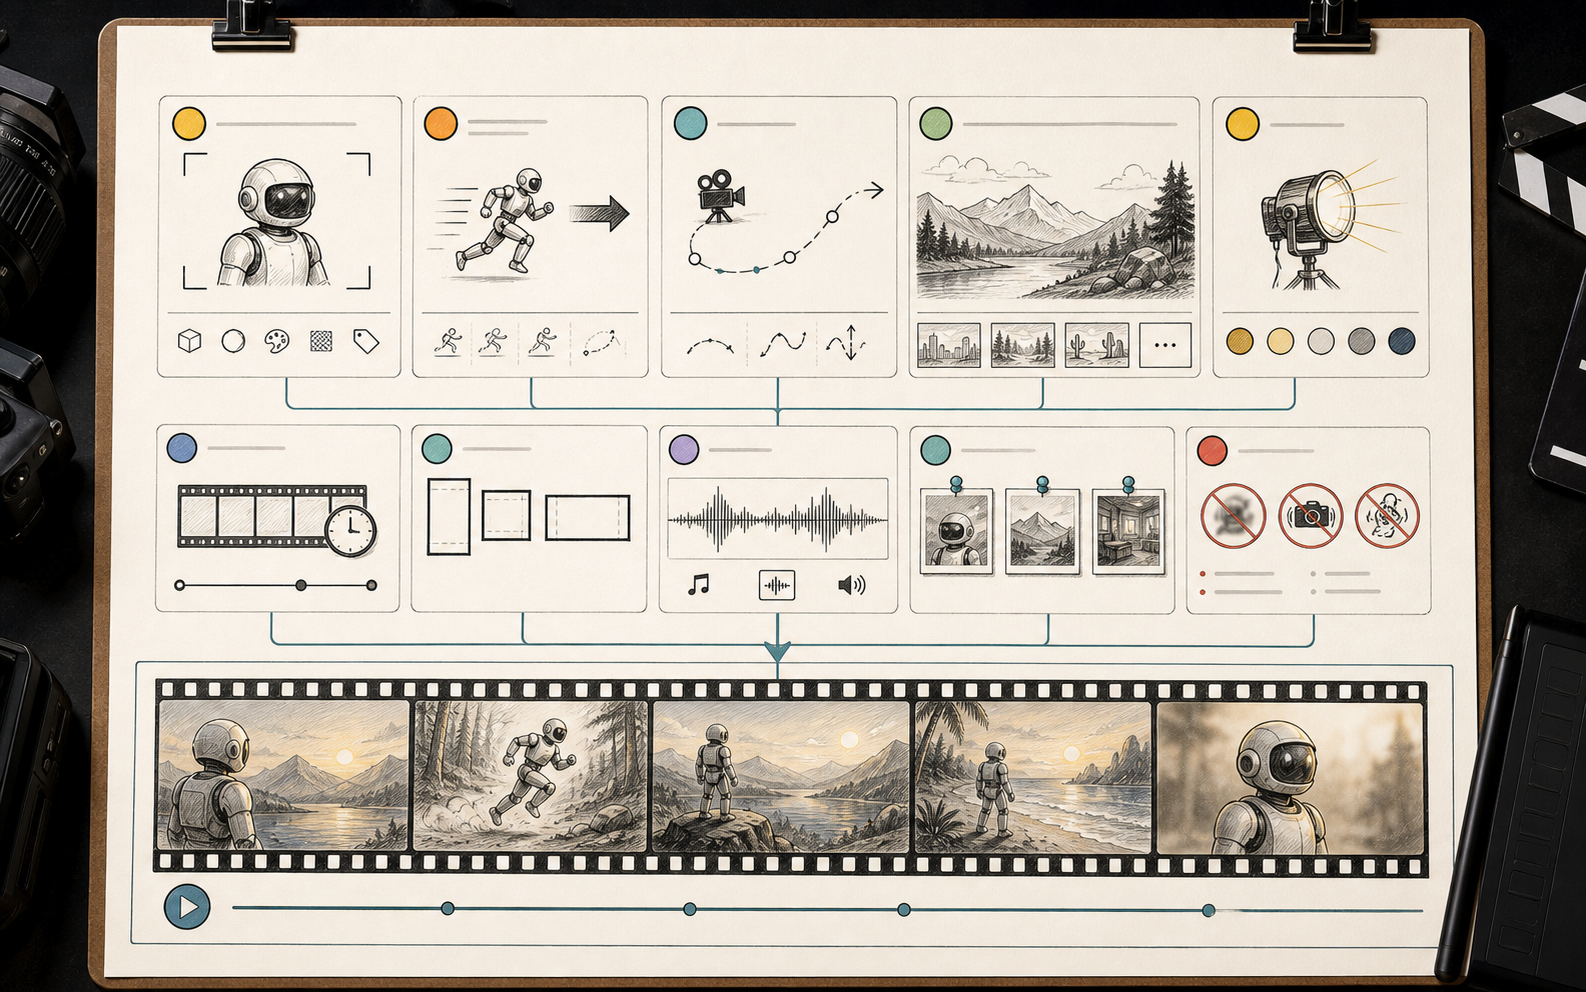
Use this structure:
Create a [duration] [aspect ratio] video.
Subject: [who or what is in the scene].
Action: [what changes during the clip].
Camera: [shot size and movement].
Scene: [location, environment, background].
Lighting: [time of day, contrast, mood].
Style: [realistic, cinematic, editorial, product demo, animation, etc.].
Audio: [ambient sound, music, sound effects, or no audio].
References: [what each uploaded asset should control].
Keep consistent: [product shape, face, outfit, room, brand color, etc.].
Avoid: [text overlays, extra logos, warped hands, fast cuts, flicker, etc.].
Here is a clean example:
Create a 6-second 9:16 product teaser.
Subject: the uploaded matte black running shoe.
Action: the shoe sits on wet asphalt while soft rain falls and neon reflections move across the sole.
Camera: low-angle close-up, slow push-in, then a slight arc to reveal the side profile.
Scene: night city street, shallow depth of field, no visible brand logos.
Lighting: blue and amber neon reflections, high contrast but realistic.
Audio: subtle rain and distant city ambience.
References: use Image 1 for the exact shoe shape and material.
Keep consistent: shoe silhouette, sole shape, color, and logo-free surface.
Avoid: text overlays, extra laces, distorted sole, human feet, fast camera shake.
That prompt is not longer because it is fancy.
It is longer because it removes avoidable ambiguity.
Step 4: Add References The Right Way
References are powerful only when you tell the model what they are for.
Do not upload five files and hope Seedance 2.0 guesses your intention.
Label them in the prompt:
Use Image 1 for the product shape.
Use Image 2 for lighting and color mood.
Use Video 1 only for camera movement.
Use Audio 1 for rhythm and pacing, not voice imitation.
This is especially important because Seedance 2.0 was designed around mixed inputs. ByteDance's 2.0 launch material describes text, image, audio, and video as supported input modalities, with reference assets used to guide composition, motion, visual effects, sound, and other parts of the generated clip.
That does not mean more references are always better.
More references can also create conflicts.
A product image may say "studio lighting." A moodboard may say "night street." A video reference may say "fast handheld motion." An audio reference may say "slow luxury pacing." If you do not specify priorities, the model has to negotiate the brief by itself.
That is where messy outputs come from.
Use references like this:
| Reference type | Best role | Prompt instruction |
|---|---|---|
| Product photo | Object identity | Use this for product shape, color, material, and proportions |
| Character image | Face, outfit, silhouette | Preserve the character look and clothing |
| Storyboard frame | Composition | Match the framing and subject placement |
| Video clip | Motion or camera | Use this only for camera path or movement rhythm |
| Audio clip | Rhythm or sound mood | Use this for pacing or ambience, not exact voice unless allowed |
| Last frame | Transition target | End the clip close to this composition |
Good reference use is boring and explicit.
That is why it works.
Step 5: Choose Duration, Ratio, Resolution, And Audio
Most bad Seedance 2.0 tests ask for too much too early.
Start with the smallest clip that can prove the idea.
For creators:
- Use 4 to 6 seconds for early drafts.
- Use 9:16 for TikTok, Reels, Shorts, and mobile ads.
- Use 16:9 for YouTube, landing pages, blog embeds, and widescreen concept clips.
- Use 1:1 when you need square social variants.
- Add audio only when sound is part of the idea.
For production:
- Do not jump to 4K until the motion and composition are approved.
- Do not pay for longer duration when the first 5 seconds already fail.
- Do not enable audio if the clip will be muted in the target channel.
- Do not use the full model for every exploration draft if Mini or Fast is enough.
Current BytePlus-style documentation separates Seedance 2.0 tiers. The full model is the serious production route where higher resolution is available. Fast and Mini are better thought of as draft or cost-sensitive options, often limited to lower resolution choices.
So the practical workflow is:
- Draft cheap.
- Approve direction.
- Rerender stronger.
- Review manually.
That is not glamorous.
It is how you avoid burning credits.
Step 6: Generate Drafts Before Finals
Seedance 2.0 is an iterative tool.
Treat the first clip as evidence, not a final answer.
Run small tests:
- One test for camera movement.
- One test for subject motion.
- One test for lighting.
- One test for audio rhythm.
- One test for reference preservation.
Change one variable at a time.
If you change prompt, image reference, duration, resolution, ratio, and audio all at once, you will not know what caused the improvement or failure.
For our site's audience, this is the most important practical advice. A model-comparison page can help users choose Seedance 2.0, Kling, Hailuo, Wan, or another tool. But once the user is inside a Seedance workflow, the quality comes from controlled iteration.
The model gives you motion.
The workflow gives you a usable asset.
Step 7: Review The Clip
Never approve an AI video from the first playback.
Watch it at normal speed. Then watch it again while looking only for failures.
Use this checklist:
| Review item | What to check |
|---|---|
| Subject identity | Does the product, character, room, outfit, or object stay consistent? |
| Motion | Does movement feel intentional, or does it melt and drift? |
| Camera | Is the camera move stable and useful for the asset? |
| Hands and faces | Are fingers, expressions, teeth, eyes, and body motion acceptable? |
| Text | Are there accidental fake words, distorted signs, or unreadable labels? |
| Logos and trademarks | Did the model invent marks you do not have rights to use? |
| Audio | Is sound synced, clean, and legally safe for your use? |
| Compression | Does the clip survive the platform where you will upload it? |
| Policy risk | Are there real people, likeness, voice, brand, or safety issues? |
| Business accuracy | Does the video make a claim your product cannot support? |
Text is still a common failure point in AI video.
If you need exact words, add them later in a deterministic editor. Use Premiere, CapCut, After Effects, Figma, HTML, or your own rendering layer. Do not ask the model to create a pricing claim, legal disclaimer, or UI label and then publish it without review.
Step 8: Use The API Like A Production Queue
If you are a developer, the Seedance 2.0 API workflow should not be treated like a synchronous chat response.
Video generation takes time. Build around tasks.
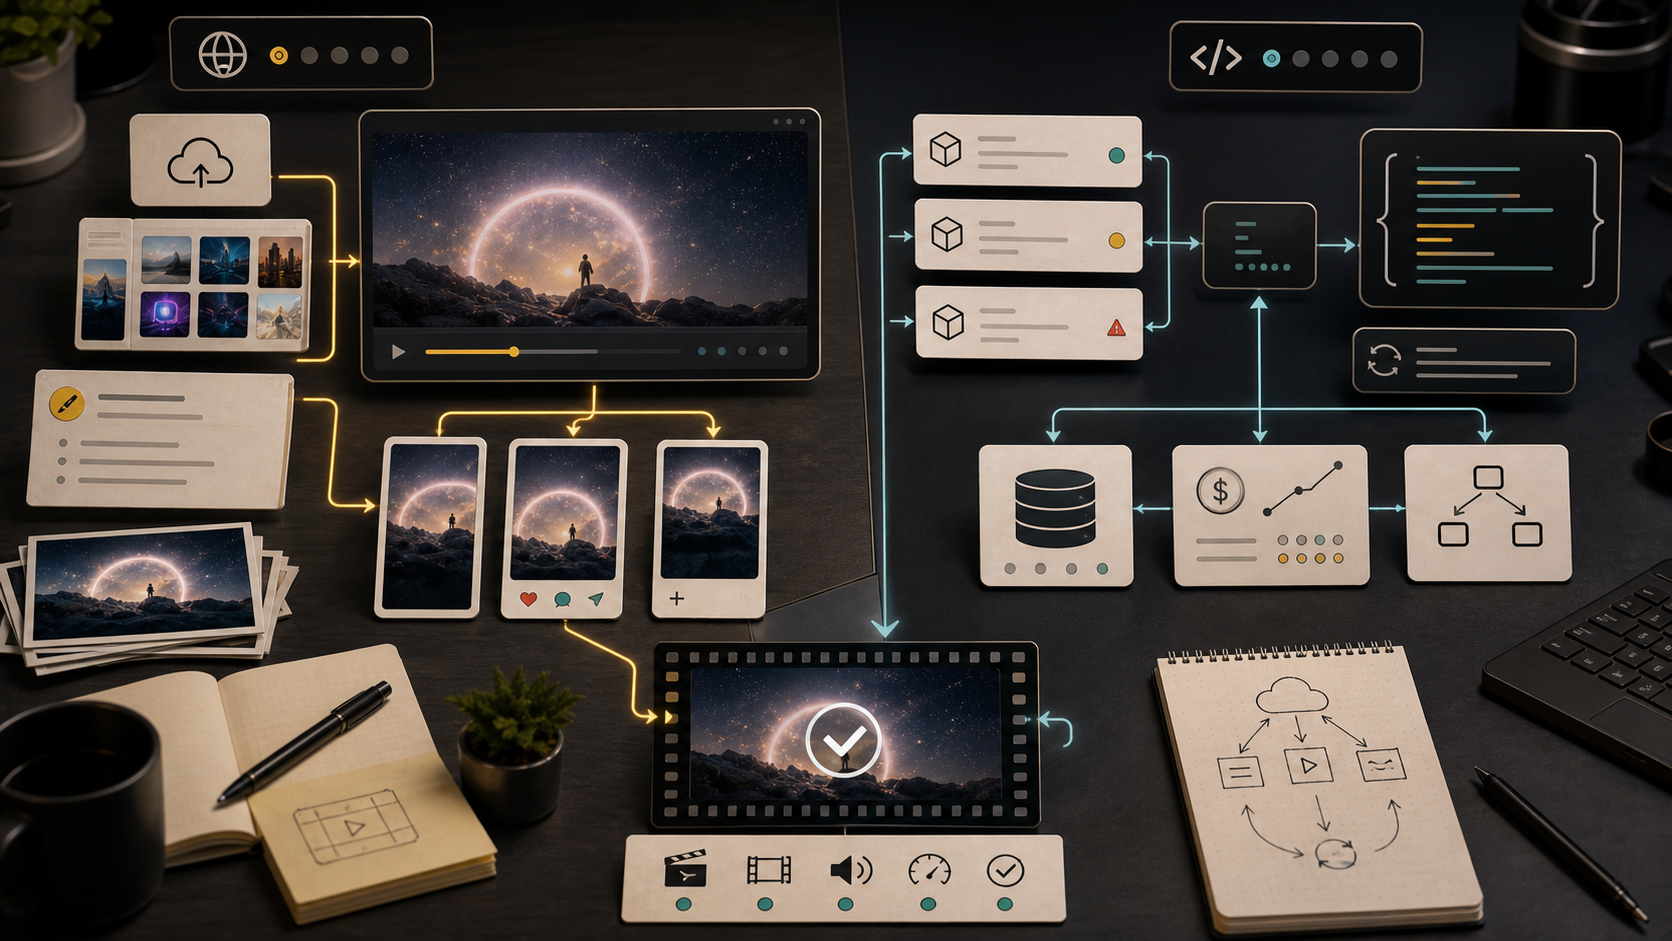
A production flow should look like this:
- User submits a prompt and optional references.
- Your backend validates prompt length, file type, file size, ratio, duration, and policy constraints.
- Your system uploads or passes asset URLs.
- Your backend creates a Seedance 2.0 video task.
- You store the task ID immediately.
- You show the user a queued or rendering state.
- You poll task status or receive a callback.
- On success, you retrieve the generated MP4.
- You copy the file into durable storage if needed.
- You log model ID, prompt, references, settings, duration, resolution, cost, and retry count.
- You expose a review, regenerate, upscale, or export action.
The task ID is not an implementation detail.
It is the spine of the product.
Without it, you cannot build progress UI, retries, support, billing, or audit logs.
How Seedance 2.0 Fits Our Site
Our site already has a model-comparison shape: users compare AI image and video tools, then decide which one fits a real job. That is the right context for Seedance 2.0.
The article should not sell Seedance 2.0 as a universal winner.
It should help users choose the right workflow.
For our site, Seedance 2.0 is strongest when positioned around:
- Text-to-video tutorials for users starting from a prompt.
- Image-to-video workflows for users with a product image, first frame, or visual reference.
- Creator-facing social video use cases.
- Marketer-facing ad draft and product teaser use cases.
- Developer-facing API task flows.
- Comparison content against Kling, Hailuo, Wan, Veo, Runway, Sora, and Seedance 2.5.
It also pairs naturally with image-generation content.
A user may generate or fix a still image first, then animate it with Seedance 2.0. That is a clean path for a site that covers both AI image and AI video tools. Still-image quality becomes the input layer. Seedance 2.0 becomes the motion layer.
That is a much better product story than "type anything and get a video."
Example Prompts
Product teaser prompt
Create a 6-second 9:16 product teaser.
Subject: the uploaded stainless steel water bottle.
Action: the bottle rotates slowly on a wet stone surface while cold mist moves behind it.
Camera: close-up, slow push-in, slight orbit from left to right.
Scene: dark studio surface with water droplets and soft reflections.
Lighting: cool rim light, warm highlight on the bottle edge, premium commercial look.
Audio: subtle water droplets and low ambient tone.
References: use Image 1 for exact bottle shape and material.
Keep consistent: bottle silhouette, cap shape, metal texture, no logo.
Avoid: text, hands, extra products, warped bottle, fast cuts.
Image-to-video character prompt
Create a 5-second 16:9 cinematic character shot.
Subject: the uploaded character standing near a rainy window.
Action: the character turns their head slightly toward the camera while rain moves on the glass.
Camera: medium close-up, slow dolly inward, stable lens.
Scene: quiet apartment at night.
Lighting: soft window reflection, blue-gray rain light, warm lamp behind the character.
Audio: soft rain ambience, no voice.
References: use Image 1 for the character face, outfit, and pose.
Keep consistent: face shape, hair, jacket, and body proportions.
Avoid: new characters, distorted hands, mouth movement, readable text, dramatic camera shake.
Social ad concept prompt
Create an 8-second vertical social ad concept.
Subject: a compact desk lamp on a clean work desk.
Action: the lamp turns on, papers become visible, and the camera glides across the workspace.
Camera: top-down opening shot, then slow low-angle slide toward the lamp.
Scene: minimalist home office at dusk.
Lighting: warm lamp glow, soft blue window light.
Audio: quiet switch click and warm room tone.
Style: realistic product commercial, calm and premium.
Keep consistent: no logo, clean desk, no human face.
Avoid: text overlays, extra products, shaky motion, flickering light.
Developer test prompt
Create a 4-second 16:9 test clip.
Subject: a single white ceramic mug on a wooden desk.
Action: steam rises slowly while morning light moves across the surface.
Camera: locked-off close-up, no zoom, no cuts.
Scene: simple kitchen table, shallow depth of field.
Lighting: natural morning light from the left.
Audio: no audio.
Purpose: benchmark object stability, steam motion, and lighting consistency.
Avoid: text, hands, logos, extra mugs, camera movement.
That last prompt is boring on purpose.
Developers should use boring benchmark prompts before they test complex scenes.
Common Mistakes
Asking for a whole commercial in one prompt
Seedance 2.0 can generate impressive short clips, but you should not ask for a full ad with three scene changes, product close-ups, a character arc, readable text, and synchronized voiceover in one shot.
Break the video into shots.
Generate the pieces.
Edit them together.
Uploading references without assigning roles
References need jobs. If one image controls the product, say that. If one video controls camera movement, say that. If one audio clip controls pacing, say that.
Unlabeled references create confused outputs.
Using high resolution before the idea works
Do not pay for high-resolution failure.
Draft first. Rerender later.
Trusting text inside video
AI video text still needs review. For exact captions, prices, app UI, labels, disclaimers, and localized copy, add text in post-production.
Ignoring rights and policy
Real people, voices, brands, products, logos, celebrities, and client assets can create policy and licensing issues.
Check the rules before publishing.
Comparing models by the best demo
Seedance 2.0, Kling, Hailuo, Wan, Veo, Runway, and Sora can all produce good samples.
That does not tell you which model works for your job.
Build a small test set and measure approved output rate, not screenshot quality.
A Practical Workflow For Creators
Here is the workflow I would use for a normal creator project:
- Decide the target platform: TikTok, YouTube, Instagram, landing page, or ad.
- Choose the aspect ratio.
- Write a 4-to-6-second prompt.
- Add one reference image if consistency matters.
- Generate two to four drafts.
- Pick the best motion direction.
- Rewrite the prompt with tighter constraints.
- Generate the final version at the needed quality.
- Add exact text, captions, music, or brand elements in an editor.
- Review before publishing.
The point is not to make Seedance 2.0 do every job.
The point is to make it do the motion job well.
A Practical Workflow For Developers
For developers, I would start smaller:
- Pick three real user tasks.
- Write ten benchmark prompts.
- Test text-to-video and image-to-video separately.
- Log latency, failures, cost, and approved output rate.
- Build task creation and polling before building fancy UI.
- Store output MP4s outside temporary provider URLs.
- Add retries with clear user messaging.
- Put a review step before public or commercial export.
If you cannot explain what happens when a task fails, your product is not ready.
That sounds harsh, but video generation products expose failure quickly. Users will wait longer for video than for text or images. If the output fails after a long wait and your app has no status, no retry path, and no usable error message, the model will get blamed for a product problem.
Seedance 2.0 vs Seedance 2.5: Which Should You Use?
Use Seedance 2.0 when you need a documented, short-form, production-friendly workflow today.
Use Seedance 2.5 when your product surface supports it and you need newer capabilities such as longer single-pass clips, larger reference sets, or more advanced editing and extension workflows.
The practical answer is access-dependent.
If your account exposes Seedance 2.5 and it performs better on your test set, use it.
If your production route is built around Seedance 2.0 model IDs, pricing, task behavior, and current documentation, Seedance 2.0 may still be the safer launch choice.
Newer is not always easier to ship.
Final Verdict
Seedance 2.0 works best when you stop treating it like a magic prompt box.
Use it like a short-form video production workflow.
Start with the job. Choose text-to-video when you are exploring. Choose image-to-video when consistency matters. Write prompts like director notes. Assign roles to references. Draft at lower cost. Review every output. Use the API as an async task queue if you are building software.
For our site's audience, that is the right positioning.
Seedance 2.0 is not just another AI video model to compare in a table. It is a practical bridge between creator-facing studio workflows and developer-facing video generation infrastructure.
The winning workflow is not "generate a video."
The winning workflow is: prepare the frame, direct the motion, control the render, review the clip, then publish only what survives inspection.
FAQ
What is the best way to use Seedance 2.0?
Use Seedance 2.0 with a clear short-form video brief. Define the subject, action, camera movement, scene, lighting, duration, aspect ratio, audio, references, consistency rules, and avoid rules. Generate short drafts before final renders.
Can I use Seedance 2.0 for text-to-video?
Yes. Text-to-video is useful for open concepts, mood scenes, social clips, and early creative exploration. Use image-to-video when the subject or composition must stay consistent.
Can I use Seedance 2.0 for image-to-video?
Yes. Image-to-video is one of the most practical Seedance 2.0 workflows. Use it for product shots, character keyframes, designed first frames, fashion visuals, real estate scenes, and e-commerce assets.
How long should a Seedance 2.0 video be?
For drafts, start with 4 to 6 seconds. Current BytePlus-style documentation for Seedance 2.0 series workflows generally points to short clips, often in the 4-to-15-second range depending on model tier and surface.
Which Seedance 2.0 model tier should I use?
Use Mini or Fast for lower-cost drafts when available. Use the full Seedance 2.0 model when the final output needs higher resolution or more production confidence. Always check your exact product surface and account access.
Does Seedance 2.0 support audio?
Seedance 2.0 is designed around audio-video generation, and ByteDance's launch material discusses audio, sound effects, background music, and synchronization. Feature exposure can vary by product surface, so confirm audio controls in the tool or API you use.
How do I write a good Seedance 2.0 prompt?
Write it like a director's brief: duration, ratio, subject, action, camera, scene, lighting, style, audio, reference roles, consistency rules, and avoid rules. Keep the shot simple until the model proves it can handle the motion.
Is Seedance 2.0 good for product videos?
Yes, especially when you start from a product image and clearly tell the model to preserve product shape, material, color, and proportions. Always review the output because AI video models can subtly change product details.
Can developers use Seedance 2.0 in an app?
Yes. The BytePlus ModelArk path is built around task-style video generation. A production app should create tasks, store task IDs, poll or receive callbacks, retrieve MP4 outputs, store files, log usage, and expose retries.
Should I use Seedance 2.0 or Seedance 2.5?
Use Seedance 2.0 when you need the documented 2.0 workflow, model tiers, and current production path. Use Seedance 2.5 when your surface supports it and your use case benefits from longer or more advanced generation. Test both if access allows.
Sources Checked
Sources were checked on August 31, 2026:
- ByteDance Seed, Seedance 2.0 Official Launch: https://seed.bytedance.com/en/blog/seedance-2-0-official-launch
- ByteDance Seed, One-take Creation, Flexible Referencing: Introducing Seedance 2.5: https://seed.bytedance.com/en/blog/one-take-creation-flexible-referencing-introducing-seedance-2-5
- BytePlus ModelArk Seedance 2.0 tutorial: https://docs.byteplus.com/api/docs/ModelArk/2291680
- BytePlus ModelArk video generation API documentation: https://docs.byteplus.com/en/docs/modelark/1520757
- BytePlus ModelArk pricing documentation: https://docs.byteplus.com/en/docs/ModelArk/1544106
- BytePlus resource packs for Dreamina Seedance models: https://docs.byteplus.com/api/docs/ModelArk/2191775
- BytePlus Seedance enhanced video generation documentation: https://docs.byteplus.com/en/docs/byteplus_las/video_gen_enhanced